

Would you like to create ghost flames or other custom paint effects, but don't know how? Here is a quick, easy, and inexpensive method. This method does not require a paint gun, airbrush, or even paint. Follow this step-by-step procedure and watch the video tutorial and you'll be able to do this to your own car. Best of all, if you don't like it, I'll even show you a method for removing it.
All it takes to do this is 1/8 inch fine line tape, 3/4 masking tape, a piece of 3000 grit sandpaper, and about 20 minutes. That's it!
Step 1 Wash Paint Finish
First you will need to remove all dirt and contaminates from the paint surface. You can wash your entire car, or if you're not up to it, just wash and clean the surface where the flame or other design will be located.
Step 2 Outline Design
Using the 1/8 inch fine line tape, create your design on the panel. You can watch how we made a flame in the video. However, any design will work the using the same method.
Step 3 Outline The Outline
Using the 3/4 inch tape, outline the fine line tape. This will give you a wider outline after you are completed. Be sure that one edge of the 3/4 inch tape laps over the fine line, but don't mask completely over your fine line tape, as this will mess your design up. Not sure what I am talking about? Just watch the video and it will all make sense.
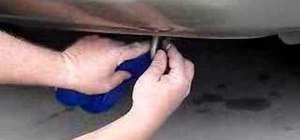
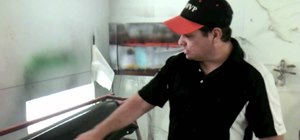
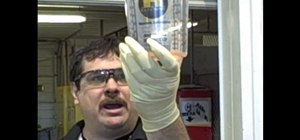
Step 4 Lightly Sand Design
Using the 3000 grit sandpaper lightly sand the design. Be careful not to sand past the outer tape edge. In the video, we are fading the effect by sanding harder on the tips and lighter on the edges. The middle of the outline was very slightly sanded. However, you can sand the entire design evenly if you wish. This will give your entire design a matte look rather than the faded look we did in the video.
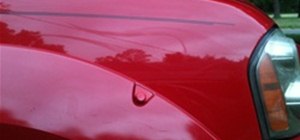
Step 5 Unmask the Design
Now simply unmask the design and you're done. It's that simple.
Facts
What if I don't like the image once it's done?
It can be removed. All you have to do is sand the edges of the design with the 3000 grit and buff the area with compound and polish and it's gone.
What if I do not want to make my own design?
3M makes a kit that has everything you need. You can print anything you want on their adhesive paper. Then you cut it out and place on desired location of car. This even eliminates the need for masking. It is called the Custom Image Kit.
How can I duplicate the design if it's for both sides of the car?
This is actually pretty simple as well. Use a piece of masking paper or even gift wrap paper (what we used in the video). Place it over the design before you unmask and use the side of a lead pencil to outline the design for you. You can then cut the design out and use it for a template for the other side.
Will this hurt my paint?
No, It only sands a small portion of the clear. In fact, most shops do this to cars they just painted. They sand the surface to remove any dirt or excessive orange peel, buff and polish.
So now you know how, give it a try and comment with your results.
Just updated your iPhone? You'll find new emoji, enhanced security, podcast transcripts, Apple Cash virtual numbers, and other useful features. There are even new additions hidden within Safari. Find out what's new and changed on your iPhone with the iOS 17.4 update.
Be the First to Comment
Share Your Thoughts