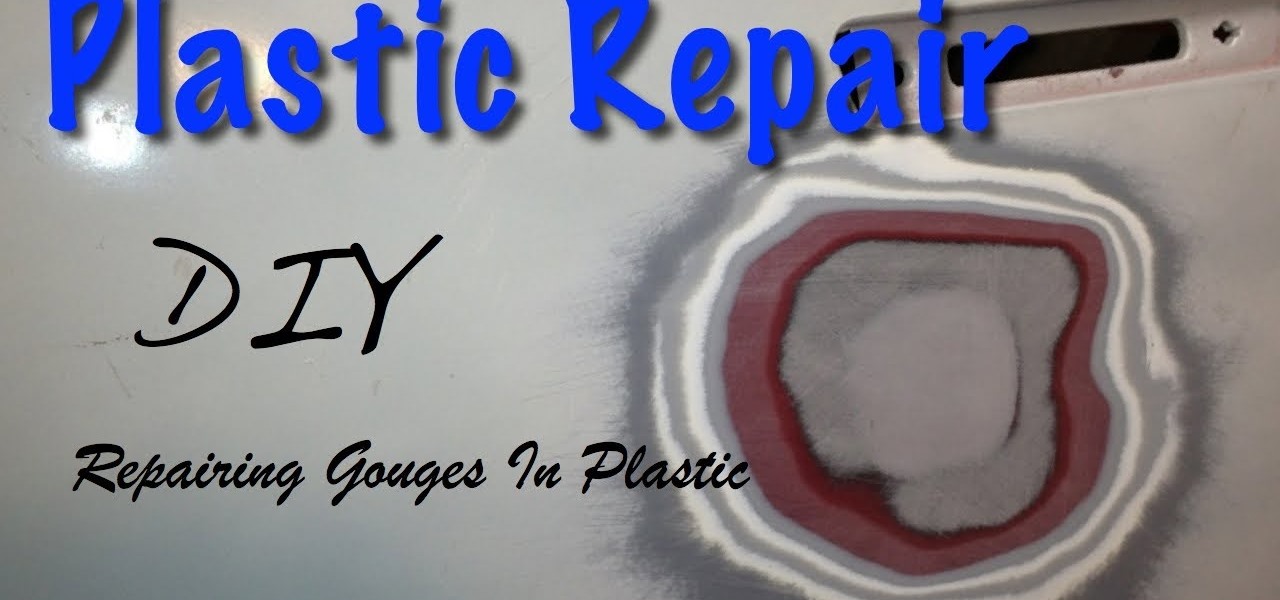

If you are wanting to learn how to perform small repairs to your car, then plastic repair is something you need to learn how to do. Cars are using more plastic now than ever before. With car required to increase fuel mileage, I don't see the use of plastic going away.
In this tutorial, I am going to demonstrate how to fix once sided, the outside of a plastic part, two sided repairs, tears and rips, and I am going to demonstrate how to repair broken tabs.
One Sided Repairs
REPAIRING PLASTIC USING ADHESIVES
¦Plastic Repair Using Adhesive
¦ Wash Plastic Part with Soap and Water.
Clean Part with a Plastic Cleaner to Assure All Contaminates Are Removed.
¦Using a 3" Grinder with 50 Grit Sandpaper, Grind Several Inches Past the Damaged Area.
¦Using a 3" Grinder with 50 Grit Sandpaper, Dish the Front Side of the Damaged Part. Once Damaged Is Dished Out, Grind an Additional Two to Three Inches Past the Damaged Area. As with Metal, You Do Not Want Adhesive Applied Over Paint.
¦Using a DA Sander with 80 Grit, Sand the Edges of the Front of Repair Area, Then Follow with 180 Grit Sandpaper to Feather Edge the Repair on the Front Side.
¦Blow Front and Back with Compressed Air to Clean Surface.
¦Apply 1 – 2 Thin Coats of Adhesion Promoter. Allow to Dry 5 Minutes or Recommended Time as Stated by Brand.
¦Apply Tape to the Front Side to Prevent Adhesive from Dripping Out.
¦Apply a Tight Coat of Adhesive to the Back Side.
¦Cut and Apply Reinforced Fiber and Apply Another Coat of Adhesive on the Top.
¦Allow to Set Up.
¦Remove Tape and Apply Adhesive on the Front Side, a Tight Coat Followed by a Fill Coat.
¦Allow to Dry and Sand with Block or DA with 80 Grit Sandpaper.
¦Apply Guide Coat and Sand with 180 Grit to Remove All 80 Grit Scratches.
¦if There Are Still Lows This Process May Need to Be Repeated, However, if It Is a Small Imperfection or Pinhole, Flexible Parts Putty May Be Applied and Sanded.
Two Side Repair - Back Side
TAB REPAIR
¦Wash With Soap and Water
¦Grind and Sand Tab Repair Area To Point
¦Drill 1/8 inch holes in repair area
¦Clean repair area using compressed air.
¦Apply thin coat of adhesion promoter to repair area and allow to dry 5 to 10 minutes.
¦Cut Plastic and Apply Adhesive to repair area
¦Precut Tab
¦Shape tab to the origional shape
¦Drill hole where tab origionally had the hole.
I hope this tutorial helped you with your plastic repairs. Be sure to share this on twitter and facebook below and give it a kudos!
Just updated your iPhone? You'll find new emoji, enhanced security, podcast transcripts, Apple Cash virtual numbers, and other useful features. There are even new additions hidden within Safari. Find out what's new and changed on your iPhone with the iOS 17.4 update.


Be the First to Comment
Share Your Thoughts